Introduction
Imagine a scoop of ice cream so decadent, so lusciously creamy, it melts on your tongue, leaving behind a symphony of sweet vanilla and rich chocolate. Now, imagine achieving that perfection right in your own kitchen, with minimal fuss and just a handful of ingredients. Welcome to the magic of homemade ice cream, where the joy of creating rivals the delight of tasting. This recipe isn’t just easy; it’s a revelation, delivering a sophisticated flavor and a velvety texture that will have everyone asking for seconds. Forget the complicated machinery and the hours of churning; this method is all about simplicity, allowing you to craft a dessert that looks as impressive as it tastes.
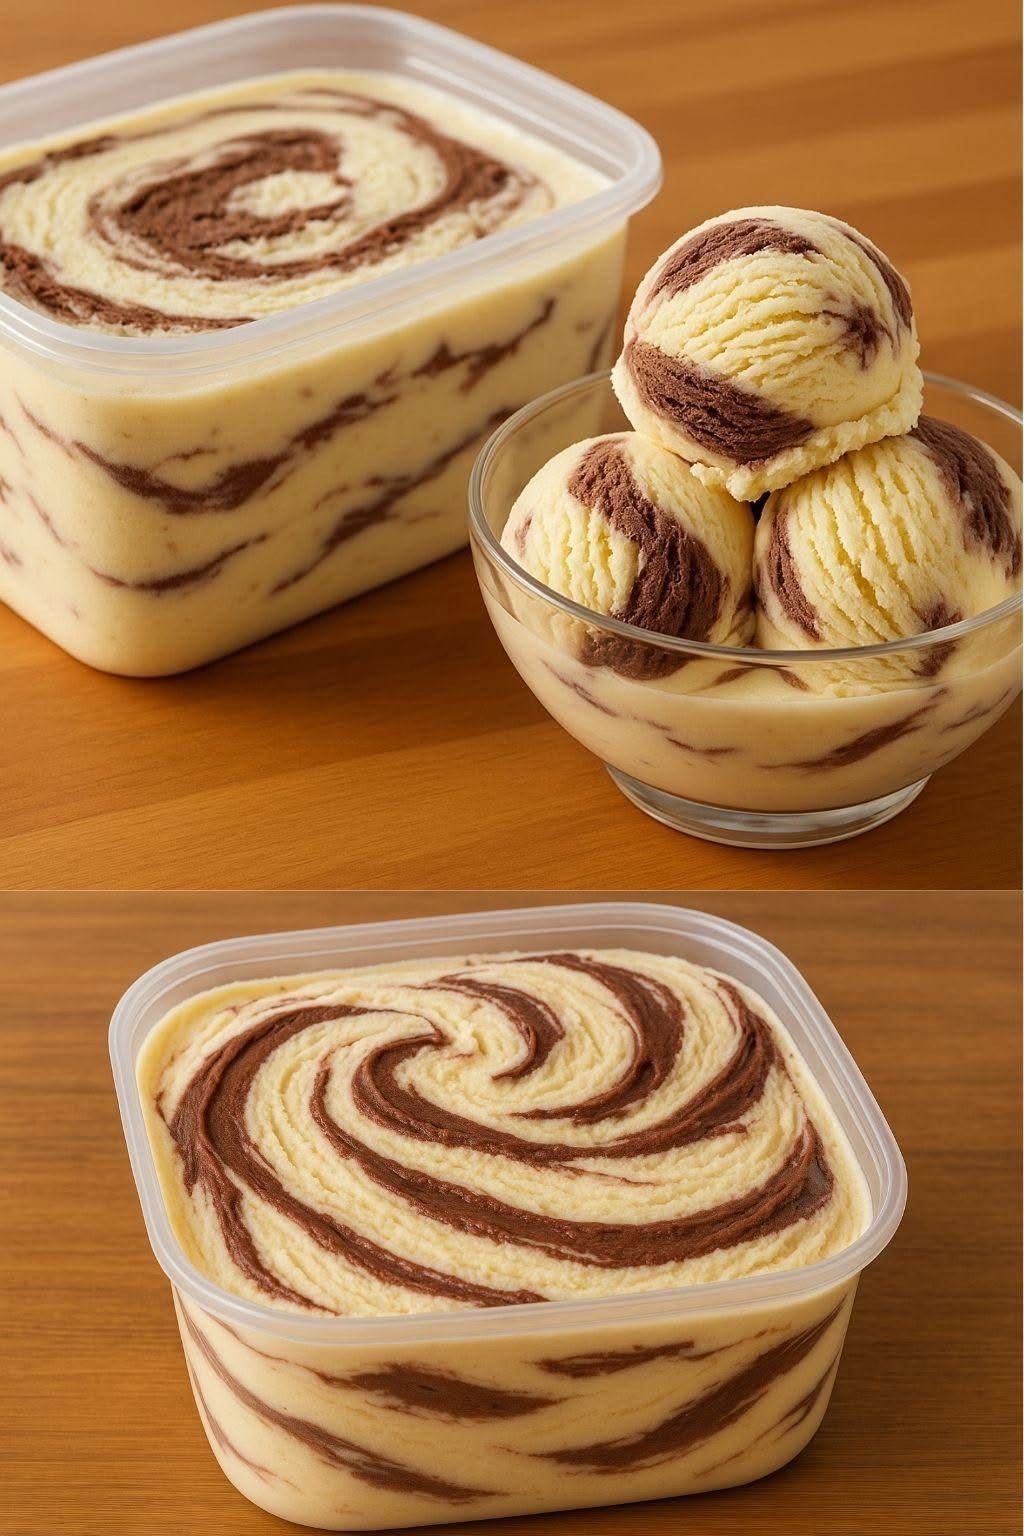
Our star today is a spectacular vanilla and chocolate swirl ice cream, a visual masterpiece with its elegant marbling and a flavor profile that perfectly balances classic sweetness with deep, luxurious cocoa notes. The secret to its unparalleled richness and creamy mouthfeel lies in a clever no-churn technique that bypasses the need for an ice cream maker entirely. This means less equipment, less clean-up, and more time to savor the anticipation of your homemade treat. Whether you’re a seasoned baker or a kitchen novice, this recipe is designed to empower you to create something truly extraordinary, proving that the best desserts don’t have to be the most complicated.
Beyond its undeniable ease and incredible taste, this homemade ice cream offers a canvas for creativity. While the vanilla and chocolate swirl is a timeless favorite, the beauty of making it yourself means endless possibilities for customization. But before we dive into variations, let’s master the core recipe – a foundation of rich, airy cream infused with vanilla, artfully swirled with a decadent chocolate ribbon. Prepare to impress your family and friends, or simply treat yourself to a scoop (or two!) of this utterly divine, effortlessly luxurious dessert. It’s perfect for any occasion, from a casual weeknight treat to the grand finale of a celebratory meal.
Nutritional Information
Per serving (approximate values, based on 8 servings for the entire batch):
- Calories: 420 kcal
- Protein: 5g
- Carbohydrates: 38g
- Fat: 29g
- Fiber: 1g
- Sodium: 80mg
Ingredients
- 2 cups (480ml) heavy cream, very cold
- 1 (14-ounce / 397g) can sweetened condensed milk, very cold
- 1 teaspoon pure vanilla extract
- 4 ounces (113g) good quality semi-sweet or dark chocolate, finely chopped
- 2 tablespoons heavy cream, extra (for the chocolate swirl)
Instructions
- Prepare Your Equipment: Place a large mixing bowl and your whisk attachment (if using a stand mixer) or beaters (if using a hand mixer) in the freezer for at least 15-20 minutes. This step is crucial for achieving perfectly whipped cream. You can also chill the sweetened condensed milk in the refrigerator alongside the heavy cream.
- Whip the Heavy Cream: Remove the chilled bowl and whisk attachment from the freezer. Pour the 2 cups of very cold heavy cream into the bowl. Begin whipping the cream on medium-low speed, gradually increasing to high speed. Continue to whip until the cream forms stiff peaks. This means when you lift the whisk, the cream holds its shape firmly. Be careful not to over-whip, or it will become grainy.
- Fold in Sweetened Condensed Milk and Vanilla: Gently pour the cold sweetened condensed milk into the whipped cream. Add the 1 teaspoon of pure vanilla extract. Using a rubber spatula, gently fold the condensed milk and vanilla into the whipped cream until just combined. Be careful not to deflate the air you’ve incorporated into the cream. This forms your creamy vanilla ice cream base.
- Prepare the Chocolate Swirl: In a microwave-safe bowl, combine the finely chopped chocolate and the 2 extra tablespoons of heavy cream. Microwave on high power in 20-second intervals, stirring well after each interval, until the chocolate is completely melted and smooth. Alternatively, you can melt the chocolate and cream together in a double boiler over simmering water, stirring until smooth. Let the chocolate mixture cool slightly, but ensure it remains pourable.
- Assemble the Swirl: Grab your freezer-safe container (a loaf pan, a rectangular plastic container with a lid, or a shallow glass dish works well). Spoon about one-third of the vanilla ice cream base into the bottom of the container, spreading it evenly. Drizzle about one-third of the cooled melted chocolate mixture over the vanilla base.
- Create the Marbled Effect: Repeat the layering process: add another third of the vanilla base, followed by another third of the chocolate drizzle. Finish with the remaining vanilla base, and then drizzle the last of the chocolate over the top. Using a butter knife or a skewer, gently swirl the chocolate through the vanilla base. Make broad, S-shaped motions, being careful not to overmix, as you want distinct ribbons of chocolate rather than a fully blended color. A few gentle swirls are all you need to create that beautiful marbled effect.
- Freeze to Perfection: Cover the container tightly with plastic wrap or an airtight lid. Place the ice cream in the coldest part of your freezer for at least 6-8 hours, or preferably overnight, until it is firm and scoopable.
- Serve and Enjoy: When ready to serve, remove the ice cream from the freezer and let it sit at room temperature for 5-10 minutes to soften slightly. This will make it easier to scoop and enhance its creamy texture. Scoop into bowls or cones and savor your homemade masterpiece!
Cooking Tips and Variations
Achieving truly spectacular homemade ice cream, even with a simple recipe, often comes down to a few key techniques and knowing how to adapt. Here are some tips to ensure your ice cream is always a triumph, along with exciting variations to spark your creativity.
Tips for Perfect Homemade Ice Cream:
- Chill Everything: This cannot be stressed enough for whipping cream! Cold cream whips faster and holds its peaks better. Make sure your heavy cream is straight from the fridge, and chilling your mixing bowl and whisk attachment beforehand makes a significant difference.
- Don’t Over-Whip the Cream: While stiff peaks are desired, over-whipping can turn your cream grainy and eventually into butter. Stop whipping as soon as the cream holds its shape firmly when the whisk is lifted.
- Gentle Folding is Key: When incorporating the sweetened condensed milk and vanilla into the whipped cream, use a light hand and a rubber spatula. You want to maintain as much of the air you’ve whipped into the cream as possible, as this is what gives the no-churn ice cream its light, airy, and creamy texture.
- Cool the Chocolate Swirl: Ensure your melted chocolate mixture has cooled slightly before drizzling it into the ice cream base. If it’s too hot, it can melt the whipped cream, compromising the texture. It should still be pourable but not warm to the touch.
- Mastering the Swirl: The goal is distinct ribbons, not a muddy brown mixture. After layering, use a butter knife, skewer, or the handle of a spoon to make gentle S-shaped or figure-eight motions through the layers. Do this only a few times. Less is more when it comes to swirling.
- Use a Good Container: A shallow, rectangular container (like a loaf pan or a plastic freezer container) is ideal as it allows the ice cream to freeze more evenly. Ensure it has an airtight lid or cover it tightly with plastic wrap to prevent ice crystals and freezer burn.
- Quality Ingredients Matter: Especially for the chocolate. A good quality semi-sweet or dark chocolate will elevate the flavor of your swirl significantly.
- Patience is a Virtue (for Freezing): Allow ample time for the ice cream to freeze completely, ideally overnight. Rushing this step will result in a softer, less firm ice cream.
- Let it Soften Before Scooping: For the creamiest, easiest-to-scoop experience, let your ice cream sit out at room temperature for 5-10 minutes before serving.
Variations to Spark Your Creativity:
- Mint Chocolate Swirl: Add 1/2 teaspoon of peppermint extract to the vanilla base along with the vanilla extract. For the chocolate swirl, you could even use Andes mints or a mint-flavored chocolate bar.
- Coffee Chocolate Swirl: Dissolve 1-2 tablespoons of instant espresso powder or strong instant coffee in 1 tablespoon of hot water, then let it cool. Add this to the vanilla ice cream base along with the vanilla extract for a mocha twist.
- Nut Butter Swirl: Instead of chocolate, gently warm 1/2 cup of your favorite nut butter (peanut, almond, or cashew) with 1-2 tablespoons of powdered sugar and a pinch of salt until slightly runny. Swirl it into the vanilla base. You can even combine this with the chocolate swirl for a chocolate-nut butter dream!
- Fruity Swirl: While not a chocolate swirl, for a non-chocolate option, you can create a fruit puree swirl. Cook down 1 cup of berries (strawberries, raspberries, blueberries) with 1-2 tablespoons of sugar until thickened, then strain to remove seeds if desired. Cool completely before swirling.
- Cookie Dough Swirl: Prepare a small batch of egg-free edible cookie dough. Break it into small pieces and gently fold or layer it into the base before freezing, alongside or instead of the chocolate swirl.
- Caramel Swirl: Drizzle in a homemade or store-bought caramel sauce, either on its own or with the chocolate for a chocolate-caramel combination. Ensure the caramel is cooled and thick enough to swirl.
- Spice it Up: Add a pinch of cinnamon or a dash of nutmeg to the vanilla base for a warm, spiced flavor, especially good with the chocolate swirl.
- Add-ins: Once the ice cream is layered and swirled (before freezing), you can gently fold in additional toppings like chopped nuts, mini chocolate chips, crushed cookies, or shredded coconut.