There’s something almost sacred about pulling a golden, crusty loaf of bread from the oven—the crackle of the crust as it cools, the earthy scent of rosemary filling your kitchen, the satisfaction of knowing you made it from scratch with just four simple ingredients.
This Rustic Rosemary Artisan Bread is exactly that kind of magic. With a shatteringly crisp crust, a soft, airy interior, and the warm, piney fragrance of fresh rosemary in every bite, it tastes like it came from a high-end bakery. But here’s the secret: it’s almost embarrassingly easy to make.
No kneading. No fancy equipment. Just time, patience, and four ingredients.
Why This Bread Works
✅ No kneading required – A long, slow rise develops gluten naturally
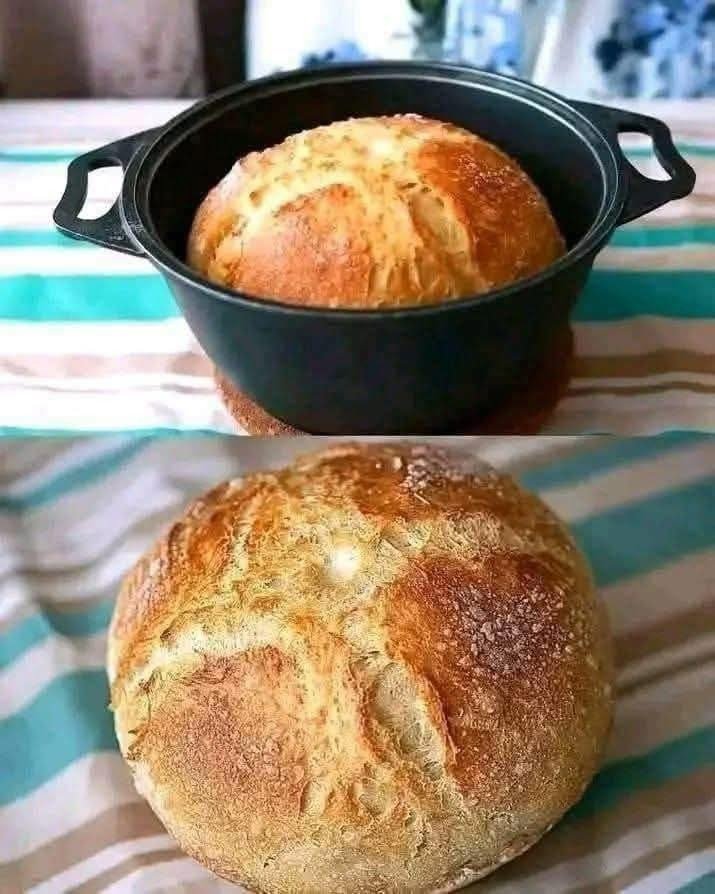
✅ Crispy, bakery-style crust – Baking in a Dutch oven creates steam
✅ Soft, airy crumb – High hydration and gentle handling
✅ Simple ingredients – Flour, water, salt, rosemary – that’s it
✅ Minimal hands-on time – 10 minutes of active work, hours of patience
✅ Beginners welcome – Hard to mess up, easy to love
The Ingredients
| Ingredient | Amount | Notes |
|---|---|---|
| All-purpose or bread flour | 3 cups (375g) | Bread flour gives a chewier crumb |
| Salt | 1½ teaspoons | Kosher or sea salt |
| Instant yeast | ½ teaspoon | Not active dry (though it works too) |
| Warm water | 1½ cups (360ml) | About 100-110°F (40-45°C) |
| Fresh rosemary | 2 tablespoons | Finely chopped (or 2 teaspoons dried) |
Optional Add-Ins:
-
1 tablespoon fresh thyme – For extra herb flavor
-
½ cup chopped Kalamata olives – For a savory twist
-
¼ cup grated Parmesan – For cheesy goodness
-
2 cloves roasted garlic – Smashed and folded in
The Method: Mix, Rest, Fold, Bake
Step 1: Combine Ingredients
In a large bowl, whisk together:
-
Flour
-
Salt
-
Yeast
-
Rosemary
Add warm water and stir with a wooden spoon or rubber spatula until a shaggy, sticky dough forms. No kneading—just stir until no dry flour remains.
Step 2: First Rise
Cover the bowl with plastic wrap or a clean kitchen towel. Let sit at room temperature for 2-3 hours, until the dough has doubled in size and is covered with bubbles.
Pro tip: The longer, slower rise develops more flavor. You can also let it rise for 1 hour at room temperature, then refrigerate overnight for even better taste.
Step 3: Shape (Gently!)
Turn the dough onto a well-floured surface. Using a bench scraper or spatula, gently fold the edges toward the center to form a rough ball. Do not knead or deflate aggressively—you want to keep those beautiful air bubbles.
Step 4: Second Rise
Place the dough on a piece of parchment paper. Cover loosely with a towel and let rise for 45-60 minutes, until puffy.
Step 5: Preheat the Dutch Oven
About 30 minutes before baking, place a Dutch oven (with lid) in your oven. Preheat to 450°F (230°C).
Step 6: Score and Bake
Carefully remove the hot Dutch oven. Lift the parchment paper with the dough and place it inside. Score the top with a sharp knife or razor blade (a few shallow slashes). Cover with the lid.
Bake for 30 minutes with the lid on. Remove the lid and bake for another 10-15 minutes, until deep golden brown and the loaf sounds hollow when tapped on the bottom.
Step 7: Cool
Transfer the bread to a wire rack and let cool completely before slicing (at least 1 hour). This step is crucial—slicing warm bread releases steam and makes it gummy.
Pro-Tips for Artisan Perfection
1. Use a Kitchen Scale
For the most consistent results, weigh your flour. 375 grams is more reliable than measuring cups.
2. Don’t Skip the Dutch Oven
The covered pot traps steam, which creates that signature crispy, crackly crust.
3. Handle Gently
The dough is wet and sticky. That’s correct. Resist the urge to add more flour.
4. Let It Cool
I know it’s hard. But slicing warm bread ruins the texture. Give it a full hour.
5. Save a Piece for Toast
This bread makes the most incredible toast—crispy, fragrant, and perfect with butter or olive oil.